XV Gateways How-To
Provide Video to Panel Events #
The following is a step-by-step guide for how to program cameras on your XV Gateway to record video when other panel events occur such as access granted or denied, door propped, arming and disarming, and alarms. This guide assumes all cameras have been installed and successfully added to the XV Gateway.
At the end of the guide we provide examples of two common use-cases:
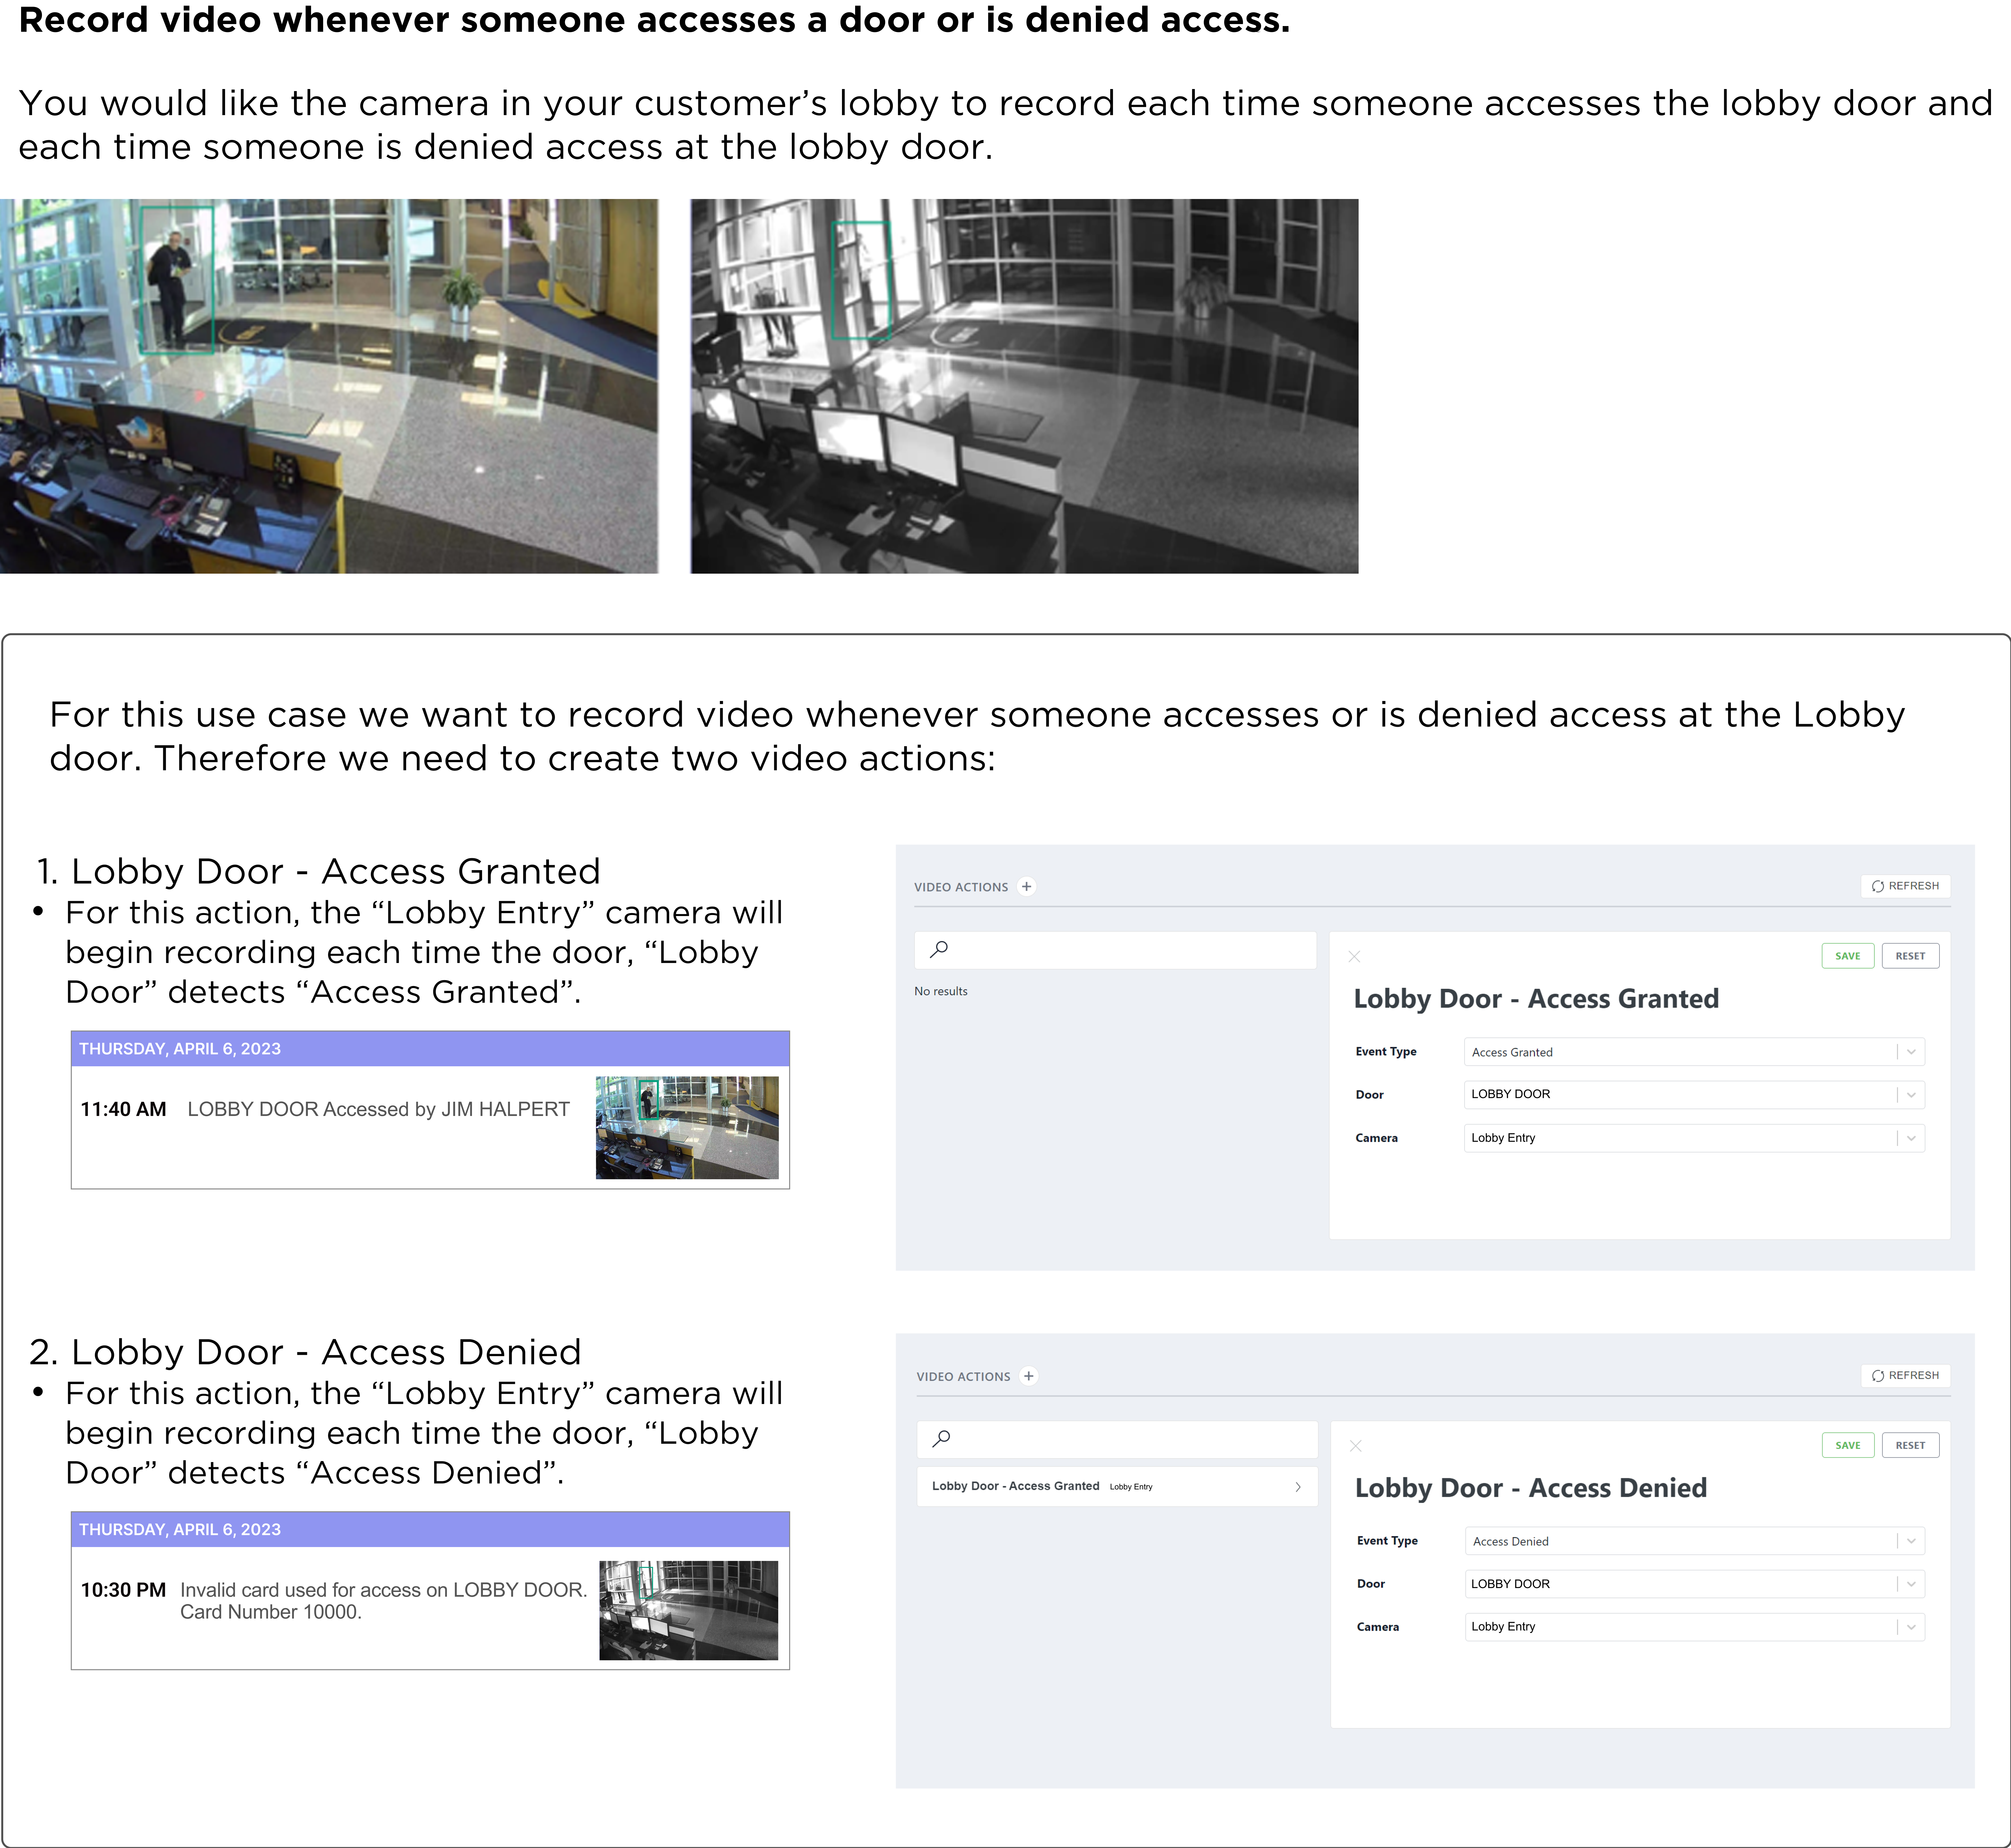
Use-Case #1: Record video whenever someone accesses a door or is denied access.
For example, you would like the camera in your customer’s lobby to record each time someone accesses the lobby door and each time someone is denied access at the lobby door.

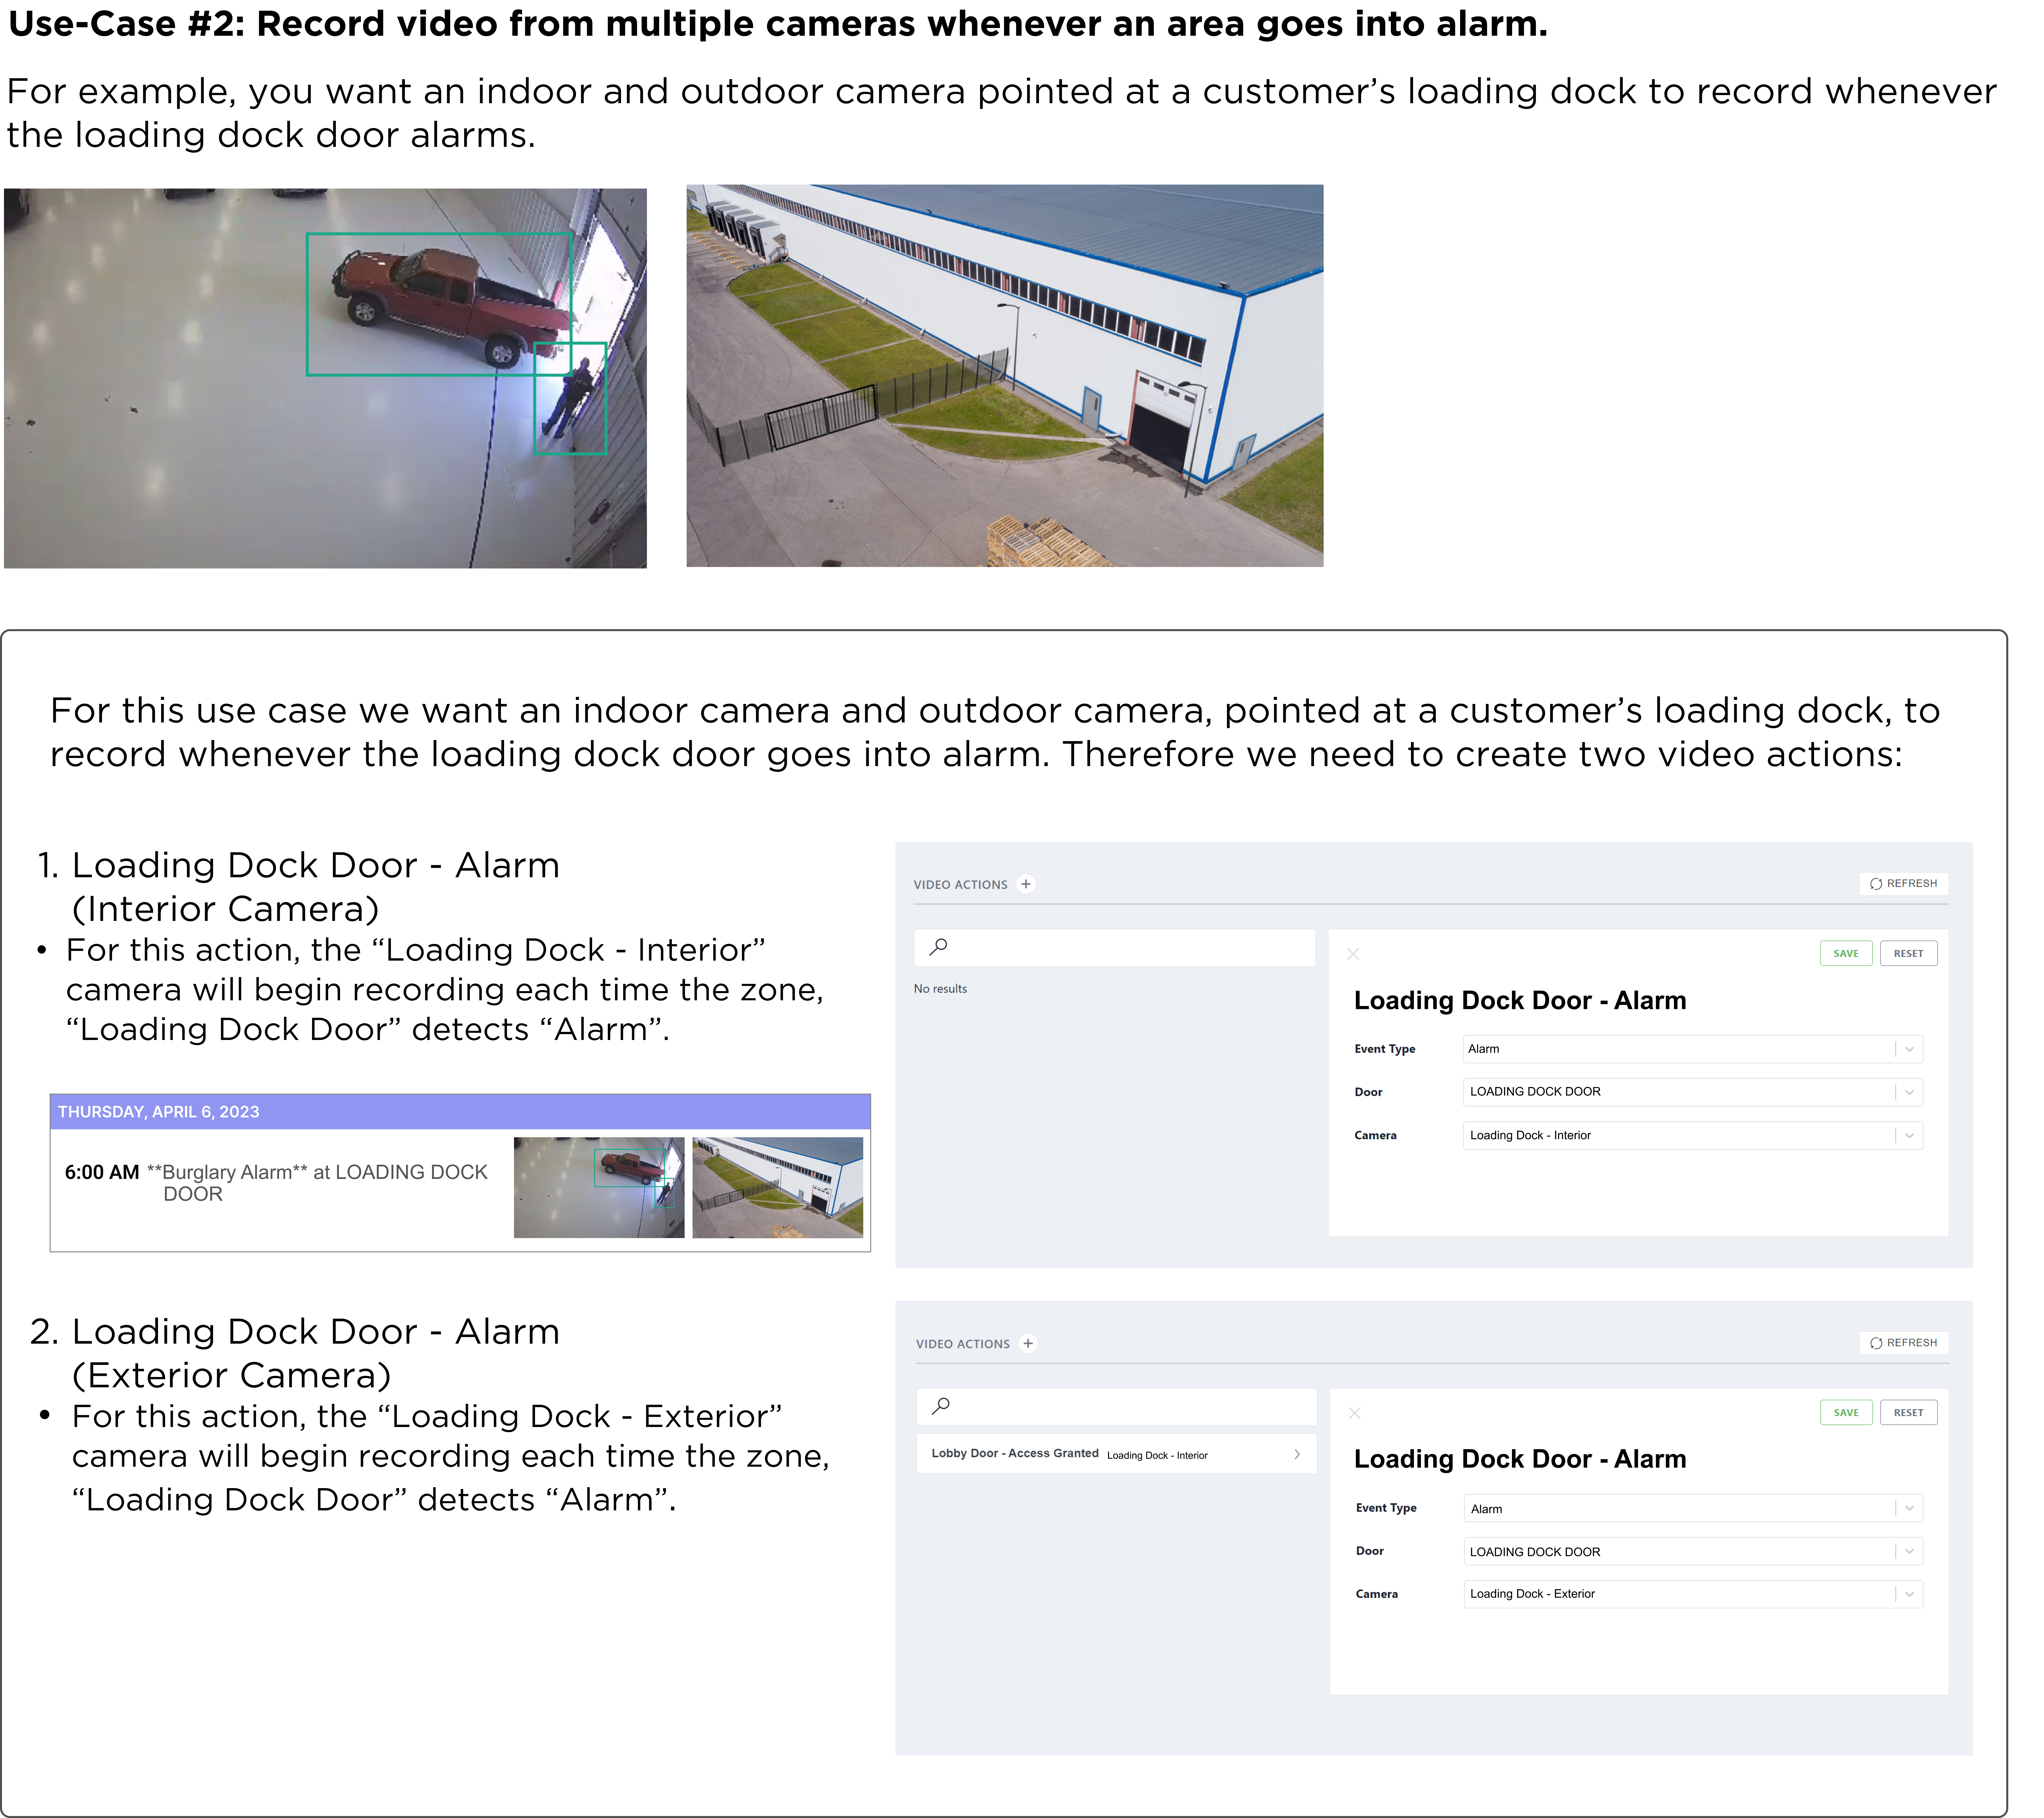
Use-Case #2: Record video from multiple cameras whenever an area goes into alarm.
For example, you want an indoor and outdoor camera pointed at a customer’s loading dock to record whenever the loading dock door alarms.

Let's get started!
Setting up Video Actions in Virtual Keypad #
1. Access Virtual Keypad
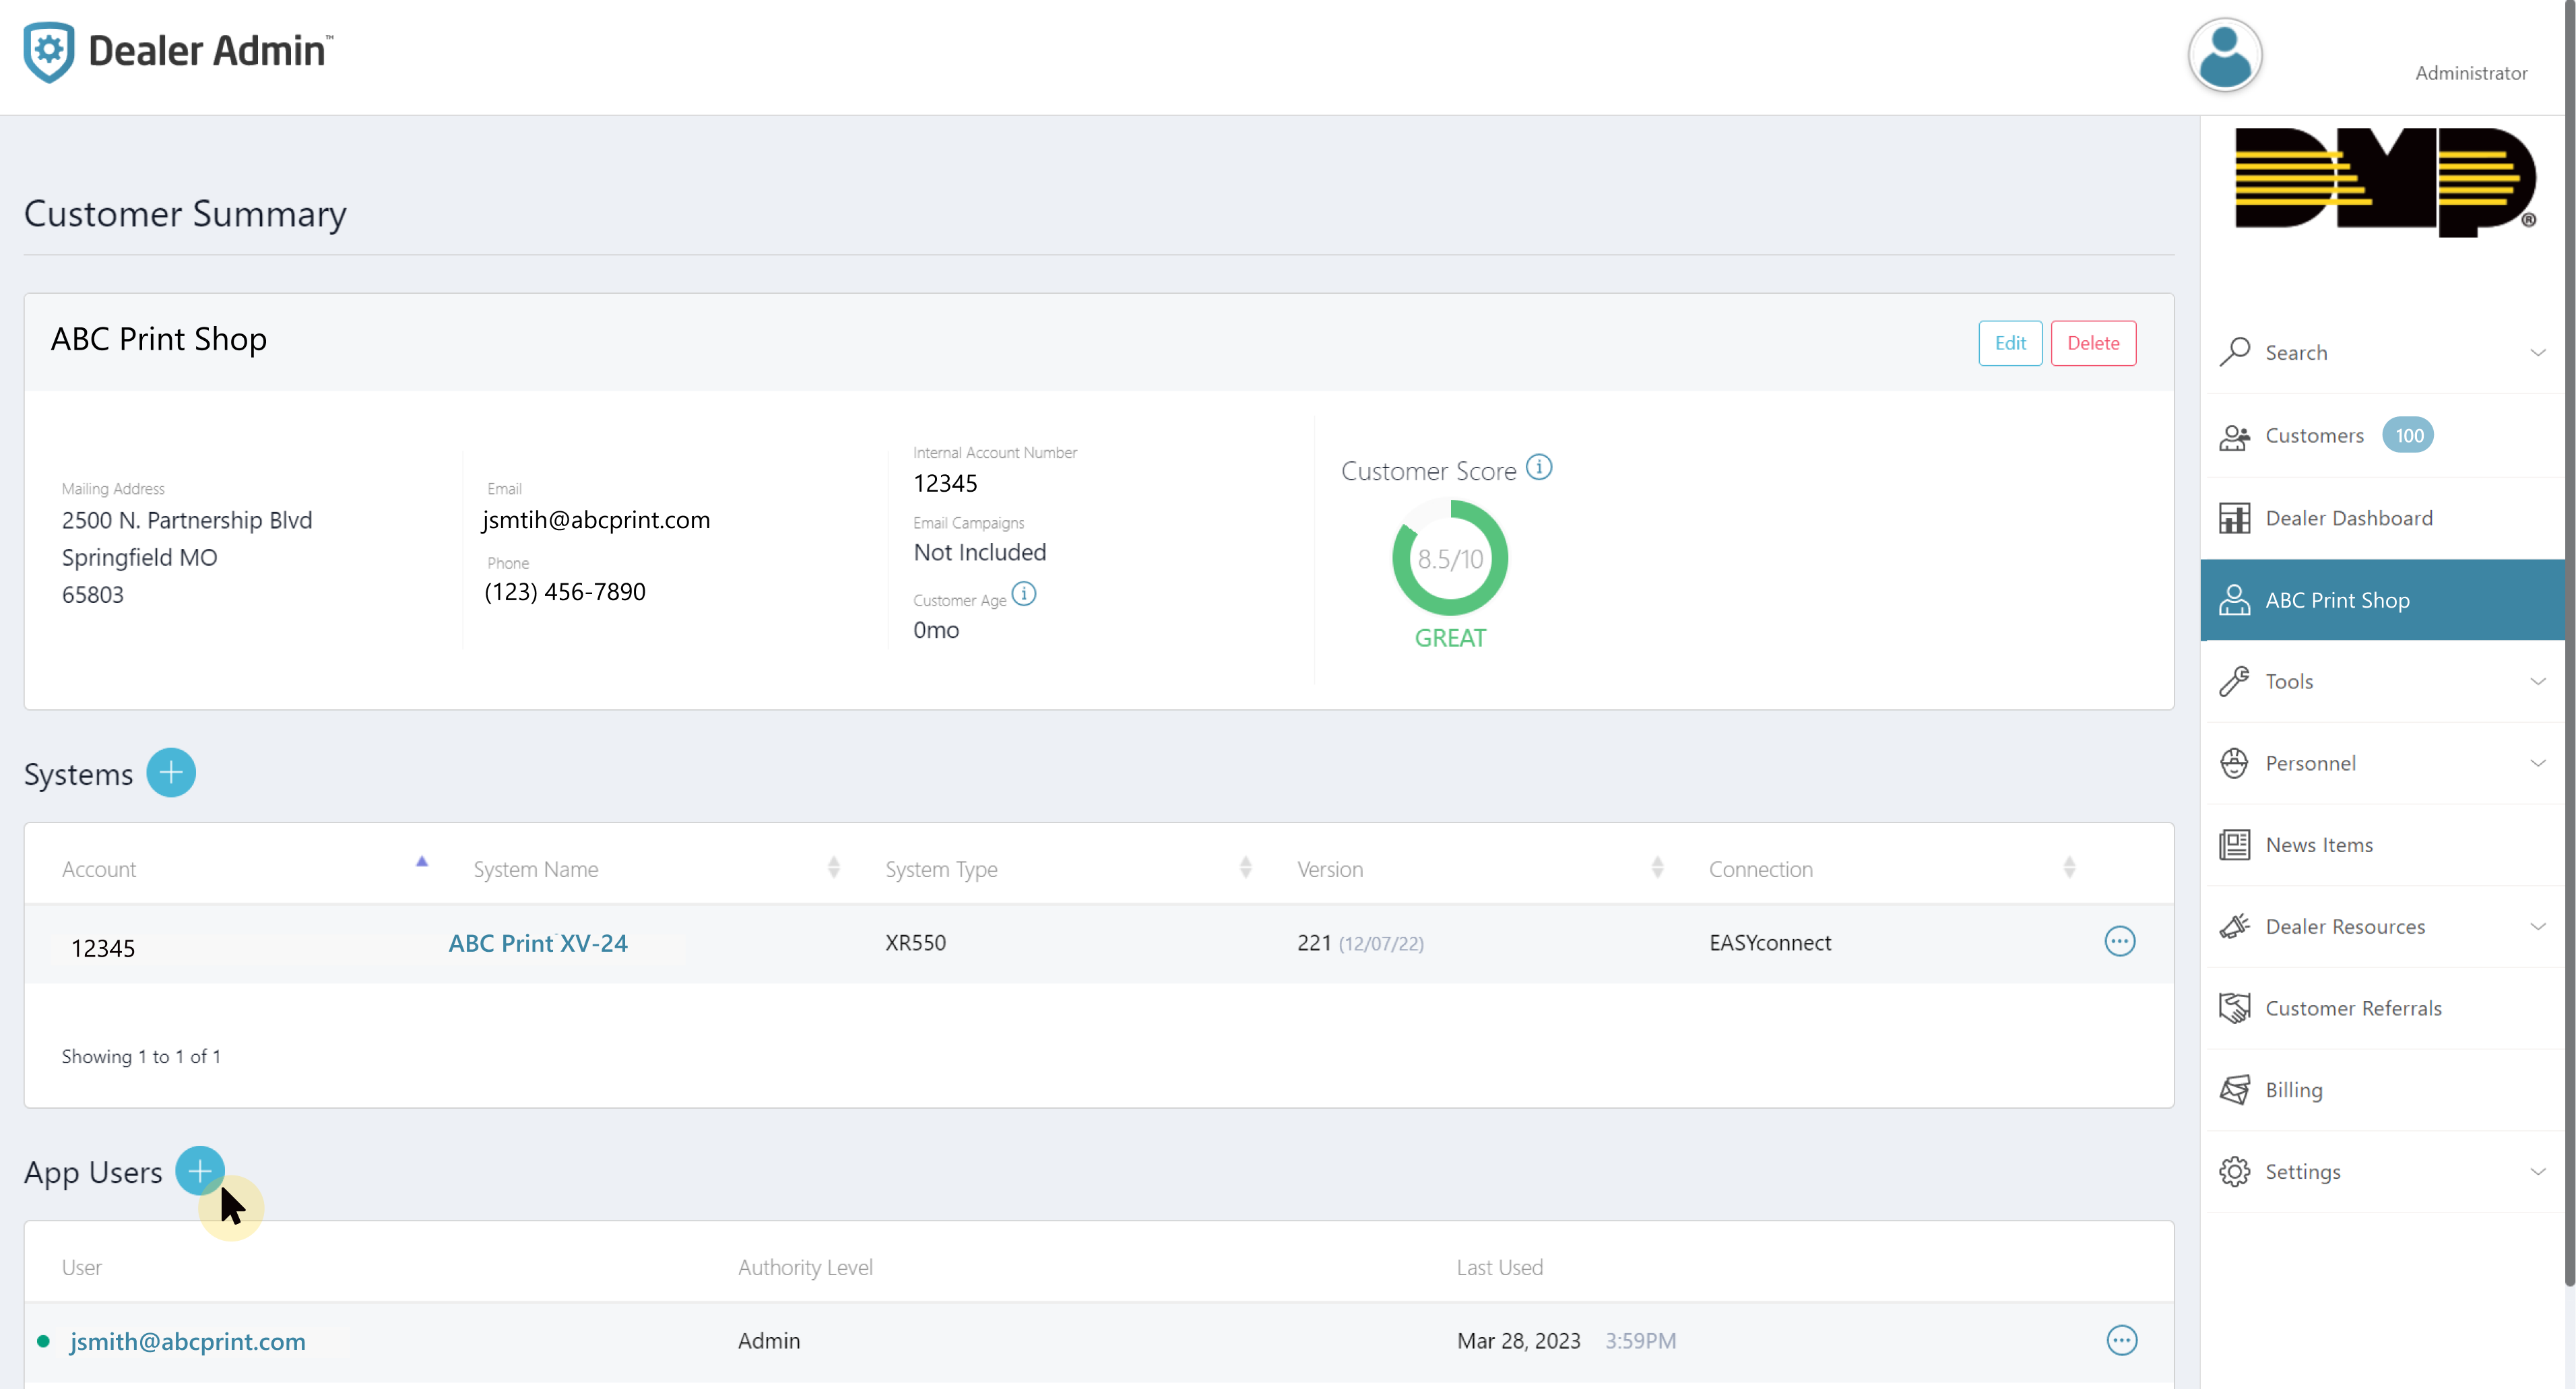
a. From the Customer Summary page in Dealer Admin create a Virtual Keypad account by clicking the plus icon next to the App Users section at the bottom of the page. Create an account.
2. Navigate to “Actions”
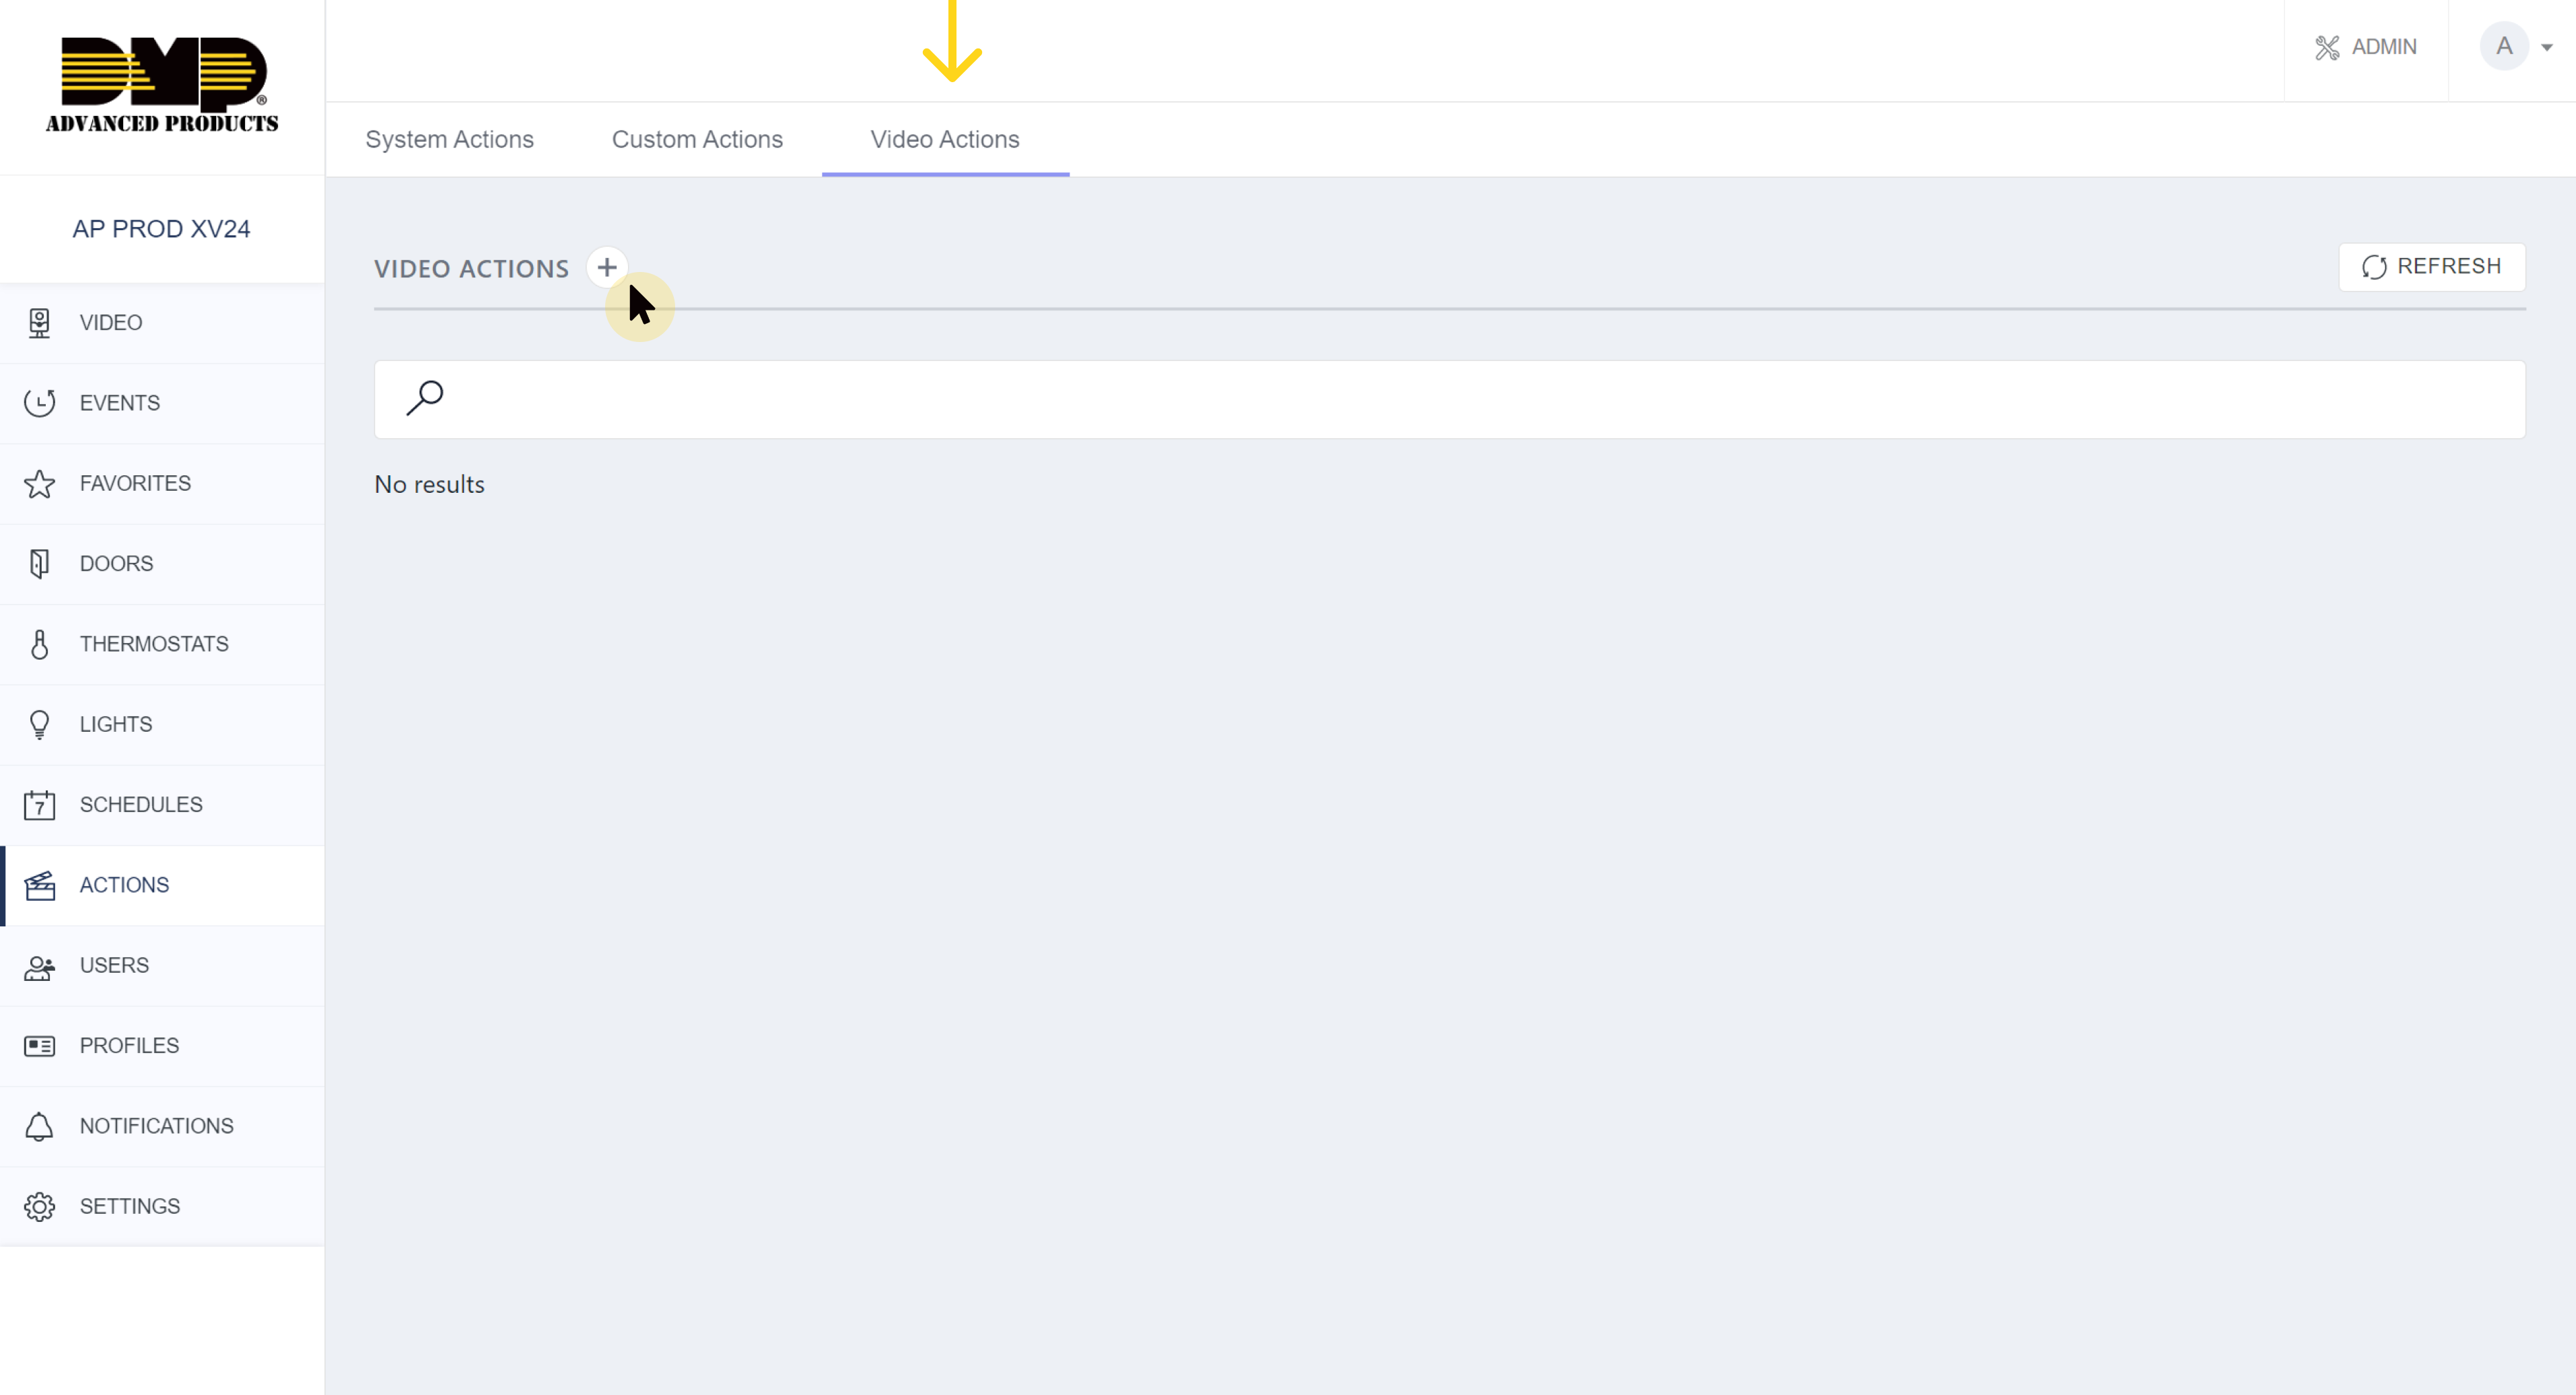
a. In Virtual Keypad, navigate to the “Actions” page located on the left-side navigation menu. Once on the Action page, select “Video Actions” at the top of the page and click the plus icon next to Video Actions.
3. Create Video Actions
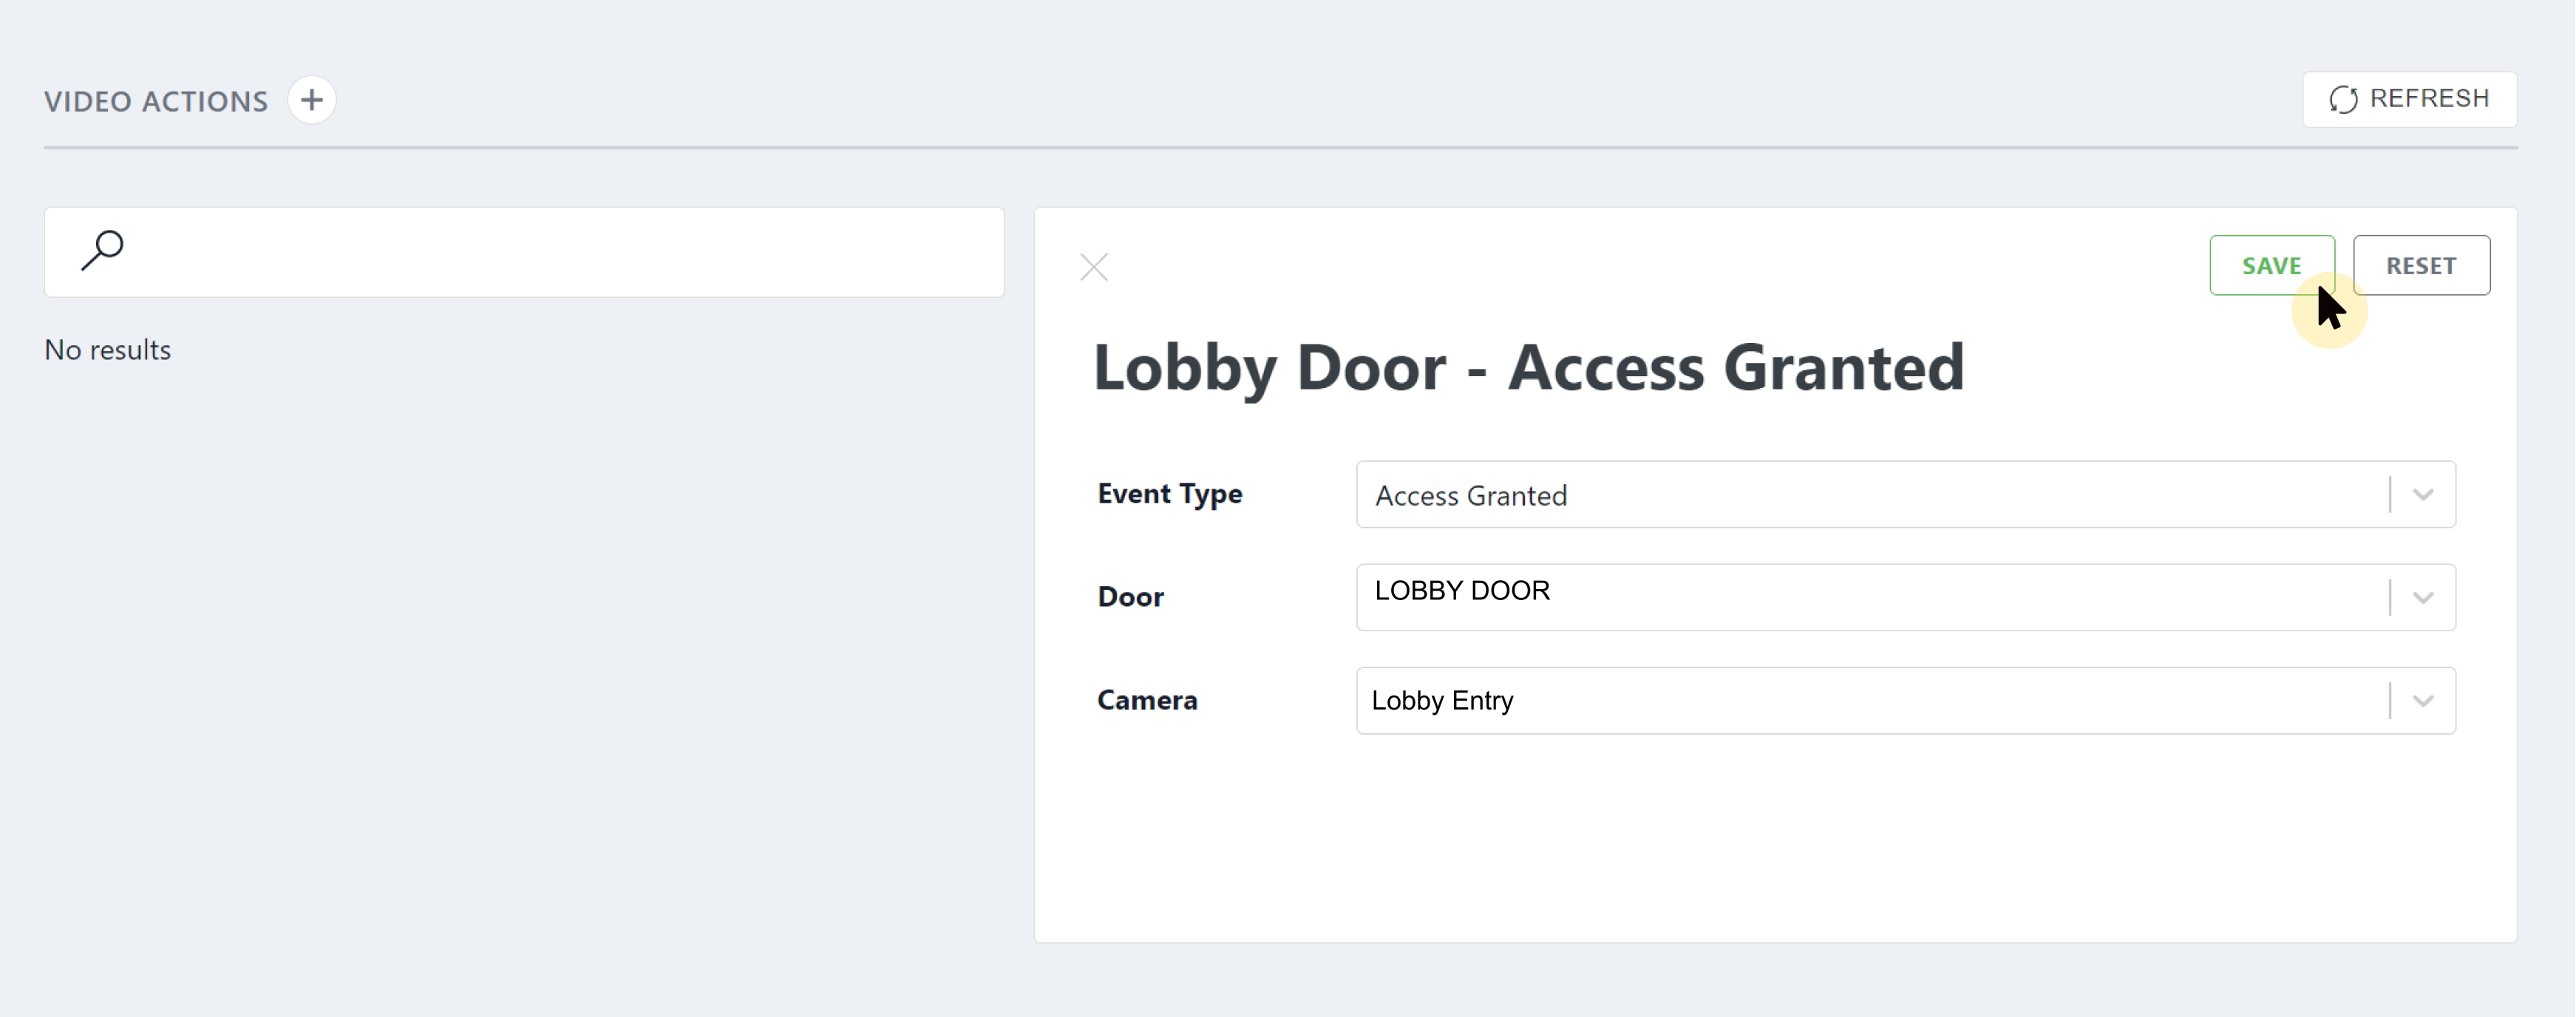
a. Name Action - we recommend naming your action using the following description:
[Zone/Area] - [Event Type] i.e. [Lobby Door] - [Access Granted].
b. Select Event Type - what event would you like to have recorded video for.
c. Select Zone/Area/Door - which gateway(s) needs to trip to start recording.
d. Select Camera - which camera you want to capture recording from.
e. Click Save
4. Repeat for each Video Action
a. Repeat this step until you have created a Video Action for each Event Type that you want to provide recorded video for.
Use-Case Example:
#
